Set Any Image As Your Wallpaper in a Variety of Styles
This is part of how I made useful and decorative minimalist desktops for my home and work computers.
Table of Contents
- Requirements
- set-wallpaper.sh
- Wallpaper Functions
- Actually Make the Wallpaper Image
- Next: Put the Wallpaper in the Root Window
I want to have a single command for setting an image as my wallpaper, choosing its style, and choosing a matching background color if it doesn't take up the whole screen.
I used to have a separate wallpaper directory, but that got large and unwieldly in addition to being essentially nothing but space-consuming duplicates of files scattered throughout my pictures directory. With this single command, the resulting wallpaper image would be the only possible duplicate of anything, though often not.
Also, whenever I want to set a new wallpaper, I can just rerun the command with a new image, style, and color, saving the resulting wallpaper image to the same file as the previous resultant wallpaper image. This means I need only configure a single static filename with static image dimensions for putting the wallpaper image on the root window.
I don't want too much cluttering up my home directory, so I also decided that my wallpaper image, along with all the rest of my desktop customization files, should live in a subdirectory of my pictures directory: "~/pictures/desktop/". The only exception is that my shellscripts live in ~/bin/ instead.
Finally, I want to eventually run my set-wallpaper command from cron, whether I'm logged in or not, so the only thing I want the command to do is create the wallpaper image, and use a different command to put it in the root window.
Requirements
My shellscripts need the following utilities:
- graphics/xli or xloadimage with png support.
- graphics/ImageMagick6 or later.
- graphics/pngcheck for making sure the wallpaper image is ready to load into the root window.
- graphics/feh and some more ImageMagick work if xli becomes unusable or unavailable.
set-wallpaper.sh
To start with, the script needs some basic variable information, namely the screen resolution and the filename to save the resulting wallpaper image in. Make sure you change them to suit your needs and preferences.
#!/bin/sh

# Change this to match your screen resolution
# If you don't know it, use one of these commands:
# xwininfo -root | grep geometry
# xdpyinfo | grep -e display -e screen -e dimensions
#
geom="1920x1080"

# Desktop directory where wallpaper lives
#
desktop="${HOME}/pictures/desktop"

# Wallpaper filename
#
wallpaper="${desktop}/wallpaper.png"
Next, some usage comments.
# Set a given image as the current wallpaper according to a given style.
#
# Usage:
#
#       set-wallpaper.sh <source-file> <style> [<color>]
#
# Use this script in your crontab to set specific images as the current
# wallpaper at specific appointed times.  For example:
#
#       # Set my morning wallpaper at 9:00 AM
#       0 9 * * *  /bin/sh $HOME/bin/set-wallpaper.sh am-paper.png tile
#       # Set my afternoon wallpaper at 1:00 PM
#       0 13 * * * /bin/sh $HOME/bin/set-wallpaper.sh pm-paper.png fill
#
# Style can be any of the style function names below.
#
# Color can be anything ImageMagick accepts.  If no color is provided,
# "black" is assumed.
#
And finally, the last bit of preparation before getting into the heart of the script.
# Get command line parameters
#
file="$1"
style="$2"
color="$3"

# Check that they're usable, quit if not
#
if [ -z "$file" ]
  then
    echo "No source file provided."
    echo "Usage: `basename $0` <source-file> <style> [<color>]"
    exit 1
  fi
if [ -z "$style" ]
  then
    echo "No style provided.  Style can be:"
    echo "tile, fill, north, east, west, south, filltile, filltilerev,"
    echo "blur, blurnorth, blureast, blurwest, blursouth, center, centerfit."
    echo "Read this command in a pager or text editor for details."
    echo "Usage: `basename $0` <source-file> <style> [<color>]"
    exit 1
  fi
if [ -z "$color" ]
  then
    color="black"
  fi
if [ ! -f "$file" ]
  then
    echo "The source file does not exist as a file."
    echo "Usage: `basename $0` <source-file> <style> [<color>]"
    exit 1
  fi
stripexif
There's one function that I need after every conversion. If an image contains optional metadata chunks, pngcheck may not recognize them and will consider the image invalid. I need pngcheck to recognize the image as valid so that I can test later whether a changed and newer-timestamped $wallpaper file is ready to be shown on the root window.
# Wallpaper correction function

stripexif() {
  #
  # After composing a wallpaper image, strip out PNG metadata so that
  # the resulting image passes as valid by pngcheck.
  #
  mogrify -define png:include-chunk=none "${wallpaper}"
}
Image Examples
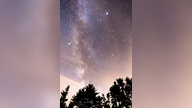
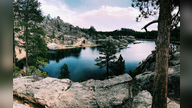
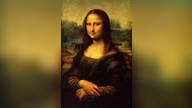
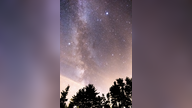
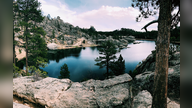
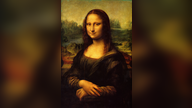
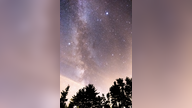
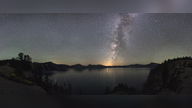
Each of the wallpaper style functions will be demonstrated with these five images:
| Full-size example: |

|
| Portrait example: |

|
| Extra tall example: |

|
| Tile example: |

|
| Extra wide example: |

|
Wallpaper Functions
And now the wallpaper functions, with the results demonstrated in thumbnails.
tile
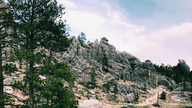
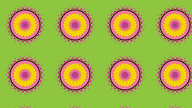
The image is laid across the screen in simple rectangular tiles at native resolution and aligned to the upper-left corner of the screen.
# Wallpaper style functions

tile() {
  #
  # Lay the image across the screen in simple rectangular tiles at
  # native resolution, aligned to the upper-left corner of the screen.
  #
  convert "${file}[0]" -write mpr:cell +delete -size "${geom}" \
  tile:mpr:cell -background ${color} -flatten "${wallpaper}"
  stripexif
}
The "[0]" in "${file}[0]" means the first image within the file. Without it, ImageMagick operates on all the files in an image, saving them with suffixes, not exclusively the name provided.
Starting images:


Results in 16:9 ratio, black background:
fill
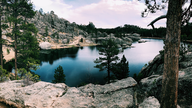
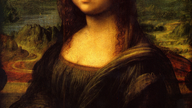
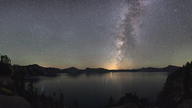
The image is scaled, either up or down, so neither dimension is smaller than the screen, and the scaled image is centered.
fill() {
  #
  # Scale the image so neither dimension is smaller than the screen, and
  # center it on the screen.
  #
  convert "${file}[0]" -resize "${geom}^" -gravity Center \
  -crop "${geom}+0+0" -background ${color} +repage "${wallpaper}"
  stripexif
}
Starting images:


Results in 16:9 ratio, black background:


north
Like fill, the image is scaled, either up or down, so neither dimension is smaller than the screen, but the scaled image is aligned to the top edge of the screen. This is meant for images with X:Y ratios larger in the Y dimension (taller) than the screen. For images with X:Y ratios larger in the X dimension instead, this has the same effect as fill.
north() {
  #
  # Scale the image so neither dimension is smaller than the screen,
  # like fill(), but align the scaled result so that the top edge of the
  # image is on the top edge of the screen.  For images with X:Y ratios
  # larger in the X dimension than the screen, this has the same effect
  # as fill().
  #
  convert "${file}[0]" -resize "${geom}^" -gravity North \
  -crop "${geom}+0+0" -background ${color} +repage "${wallpaper}"
  stripexif
}
Starting images:


Results in 16:9 ratio, black background:
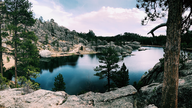
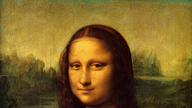


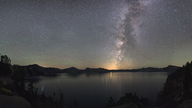
east
Like fill, the image is scaled, either up or down, so neither dimension is smaller than the screen, but the scaled image is aligned to the right edge of the screen. This is meant for images with X:Y ratios larger in the X dimension (wider) than the screen. For images with X:Y ratios larger in the Y dimension instead, this has the same effect as fill.
east() {
  #
  # Scale the image so neither dimension is smaller than the screen,
  # like fill(), but align the scaled result so that the right edge of
  # the image is on the right edge of the screen.  For images with X:Y
  # ratios larger in the Y dimension than the screen, this has the same
  # effect as fill().
  #
  convert "${file}[0]" -resize "${geom}^" -gravity East \
  -crop "${geom}+0+0" -background ${color} +repage "${wallpaper}"
  stripexif
}
Starting images:


Results in 16:9 ratio, black background:
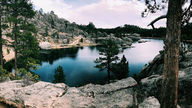
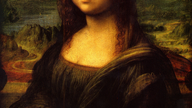


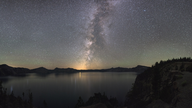
west
Like fill, the image is scaled, either up or down, so neither dimension is smaller than the screen, but the scaled image is aligned to the right edge of the screen. This is meant for images with X:Y ratios larger in the X dimension (wider) than the screen. For images with X:Y ratios larger in the Y dimension instead, this has the same effect as fill.
west() {
  #
  # Scale the image so neither dimension is smaller than the screen,
  # like fill(), but align the scaled result so that the left edge of
  # the image is on the left edge of the screen.  For images with X:Y
  # ratios larger in the Y dimension than the screen, this has the same
  # effect as fill().
  #
  convert "${file}[0]" -resize "${geom}^" -gravity West \
  -crop "${geom}+0+0" -background ${color} +repage "${wallpaper}"
  stripexif
}
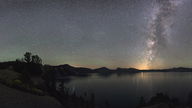
Starting images:


Results in 16:9 ratio, black background:
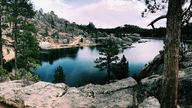
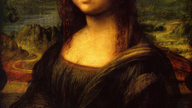


south
Like fill, the image is scaled, either up or down, so neither dimension is smaller than the screen, but the scaled image is aligned to the bottom edge of the screen. This is meant for images with X:Y ratios larger in the Y dimension (taller) than the screen. For images with X:Y ratios larger in the X dimension instead, this has the same effect as fill.
south() {
  #
  # Scale the image so neither dimension is smaller than the screen,
  # like fill(), but align the scaled result so that the bottom edge of
  # the image is on the bottom edge of the screen.  For images with X:Y
  # ratios larger in the X dimension than the screen, this has the same
  # effect as fill().
  #
  convert "${file}[0]" -resize "${geom}^" -gravity South \
  -crop "${geom}+0+0" -background ${color} +repage "${wallpaper}"
  stripexif
}
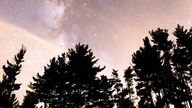
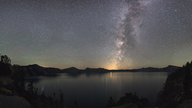
Starting images:


Results in 16:9 ratio, black background:



filltile
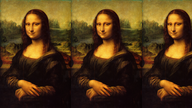
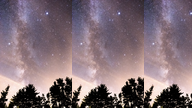
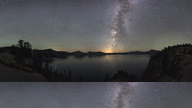
The image is scaled, up or down, to the largest size that will fit entirely within the screen dimensions, then laid across the screen in simple rectangular tiles. Unlike tile, there is only one row or one column. If the image is scaled to the same height as the screen, then the tile is aligned to the left edge. Otherwise, if it's scaled to the same width as the screen, then the tile is aligned to the top of the screen.
filltile() {
  #
  # Scale the image to the largest size that will fit within the screen
  # dimensions, then lay the scaled result across the screen in simple
  # rectangular tiles.  Images scaled to the same height as the screen
  # height are aligned to the left edge, and images scaled to the same
  # width as the screen width are aligned to the top edge.
  #
  convert "${file}[0]" -resize "${geom}" +repage -write mpr:cell \
  +delete -size "${geom}" tile:mpr:cell -background ${color} \
  -flatten "${wallpaper}"
  stripexif
}
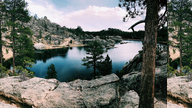
Starting images:


Results in 16:9 ratio, black background:

filltilerev
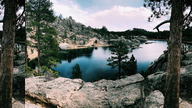
Like filltile, the image is scaled, up or down, to the largest size that will fit entirely within the screen dimensions, then laid across the screen in simple rectangular tiles. Like filltile and unlike tile, there is only one row or one column. The difference is, if the image is scaled to the same height as the screen, then the tile is aligned to the right edge, or if it's scaled to the same width as the screen, then the tile is aligned to the bottom of the screen.
The only way I know of for achieving this effect in ImageMagick is to flip the image upside down twice. This is what the "-flip -flop" options do. First, the image is turned over before being made into a tile. Then, the tiled result is turned over so the tiles are right side up again.
filltilerev() {
  #
  # Scale the image to the largest size that will fit within the screen
  # dimensions, then lay the scaled result across the screen in simple
  # rectangular tiles, like filltile(), but the scaled result is
  # aligned to the opposite edge of the screen.  This is accomplished by
  # turning the image upside down, doing filltile() on the upside down
  # image, then turning the resulting wallpaper upside down in order to
  # turn the tiled image back rightside up.
  #
  convert "${file}[0]" -flip -flop -resize "${geom}" +repage \
  -write mpr:cell +delete -size "${geom}" tile:mpr:cell \
  -background ${color} -flatten -flip -flop "${wallpaper}"
  stripexif
}
Starting images:


Results in 16:9 ratio, black background:
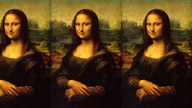


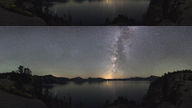
center
The image is centered on the screen at native resolution. If the image is bigger than the screen, then only the center of the image is shown. If the image is bigger than the screen in only one dimension, then letterbox-type borders will appear on the other dimension's edges.
center() {
  #
  # Center the image on the screen at native resolution.
  #
  convert "${file}[0]" -background ${color} \
  -gravity Center -extent "${geom}" "${wallpaper}"
  stripexif
}
Starting images:


Results in 16:9 ratio, black background:




centerfit
Like filltile, the image is scaled, either up or down, to the largest size that will fit entirely within the screen dimensions. However, the scaled image is then centered on the screen. If the image ratio doesn't match the screen ratio, then letterbox borders will appear on either the left and right or the top and bottom, both in the background color.
centerfit() {
  #
  # Scale the image to the largest size that will fit within the screen
  # dimensions, like filltile(), but center the scaled result on the
  # screen.
  #
  convert "${file}[0]" -resize "${geom}" -background ${color} \
  -gravity Center -extent "${geom}" "${wallpaper}"
  stripexif
}
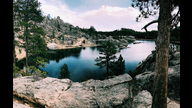
Starting images:


Results in 16:9 ratio, black background:

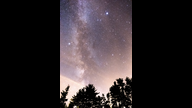

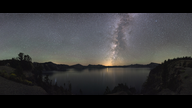
blur
The image is transformed twice, with the second transformation overlaid on the first, so that the first transformation serves as a letterbox border, either top and bottom or left and right. This is meant for images that aren't even close to the same X:Y ratio as the screen.
First, the image is scaled like fill to fill the entire screen and centered, then a blur transformation is applied.
Second, the original image is scaled like centerfit to the largest size that will fit entirely within the screen dimensions and centered on top of the first transformation.
blur() {
  #
  # Perform two transformations, second overlaid on top of the first.
  # First, scale the image to fill the entire screen, centered like
  # fill(), and transformed into a blurry background border image.
  # Second, scale the image to the largest size that will fit within the
  # screen dimensions, like filltile(), but center the scaled result.
  #
  convert "${file}[0]" -resize "${geom}^" -gravity Center \
  -crop "${geom}+0+0" +repage -blur 0x5 "${wallpaper}"
  convert "${file}[0]" -resize "${geom}" -gravity Center \
  -page "${geom}" -background ${color} miff:- | \
  convert -define png:size=${geom} miff:- "${wallpaper}" +swap \
  -gravity Center -background ${color} -composite "${wallpaper}"
  stripexif
}
Starting images:


Results in 16:9 ratio, black background:
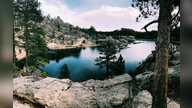
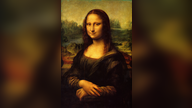


blurnorth
The image is transformed twice, with the second transformation overlaid on the first, so that the first transformation serves as a letterbox border, either top and bottom or left and right. This is meant for images that aren't even close to the same X:Y ratio as the screen.
First, the image is scaled like north to fill the entire screen and aligned to the top, then a blur transformation is applied. Like north, this is meant for images with X:Y ratios larger in the Y dimension (taller) than the screen.
Second, the original image is scaled like centerfit to the largest size that will fit entirely within the screen dimensions and centered on top of the transformation.
blurnorth() {
  #
  # Perform two transformations, identical to blur(), except that the
  # background image is aligned like north().
  #
  convert "${file}[0]" -resize "${geom}^" -gravity North \
  -crop "${geom}+0+0" +repage -blur 0x5 "${wallpaper}"
  convert "${file}[0]" -resize "${geom}" -gravity Center \
  -page "${geom}" -background ${color} miff:- | \
  convert -define png:size=${geom} miff:- "${wallpaper}" +swap \
  -gravity Center -background ${color} -composite "${wallpaper}"
  stripexif
}
Starting images:


Results in 16:9 ratio, black background:

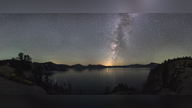
blureast
The image is transformed twice, with the second transformation overlaid on the first, so that the first transformation serves as a letterbox border, either top and bottom or left and right. This is meant for images that aren't even close to the same X:Y ratio as the screen.
First, the image is scaled like east to fill the entire screen and aligned to the right, then a blur transformation is applied. Like east, this is meant for images with X:Y ratios larger in the X dimension (wider) than the screen.
Second, the original image is scaled like centerfit to the largest size that will fit entirely within the screen dimensions and centered on top of the transformation.
blureast() {
  #
  # Perform two transformations, identical to blur(), except that the
  # background image is aligned like east().
  #
  convert "${file}[0]" -resize "${geom}^" -gravity East \
  -crop "${geom}+0+0" +repage -blur 0x5 "${wallpaper}"
  convert "${file}[0]" -resize "${geom}" -gravity Center \
  -page "${geom}" -background ${color} miff:- | \
  convert -define png:size=${geom} miff:- "${wallpaper}" +swap \
  -gravity Center -background ${color} -composite "${wallpaper}"
  stripexif
}
Starting images:


Results in 16:9 ratio, black background:

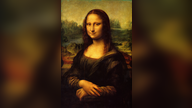
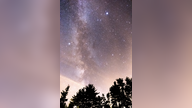

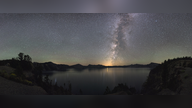
blurwest
The image is transformed twice, with the second transformation overlaid on the first, so that the first transformation serves as a letterbox border, either top and bottom or left and right. This is meant for images that aren't even close to the same X:Y ratio as the screen.
First, the image is scaled like west to fill the entire screen and aligned to the left, then a blur transformation is applied. Like west, this is meant for images with X:Y ratios larger in the X dimension (wider) than the screen.
Second, the original image is scaled like centerfit to the largest size that will fit entirely within the screen dimensions and centered on top of the transformation.
blurwest() {
  #
  # Perform two transformations, identical to blur(), except that the
  # background image is aligned like west().
  #
  convert "${file}[0]" -resize "${geom}^" -gravity West \
  -crop "${geom}+0+0" +repage -blur 0x5 "${wallpaper}"
  convert "${file}[0]" -resize "${geom}" -gravity Center \
  -page "${geom}" -background ${color} miff:- | \
  convert -define png:size=${geom} miff:- "${wallpaper}" +swap \
  -gravity Center -background ${color} -composite "${wallpaper}"
  stripexif
}
Starting images:


Results in 16:9 ratio, black background:

blursouth
The image is transformed twice, with the second transformation overlaid on the first, so that the first transformation serves as a letterbox border, either top and bottom or left and right. This is meant for images that aren't even close to the same X:Y ratio as the screen.
First, the image is scaled like south to fill the entire screen and aligned to the bottom, then a blur transformation is applied. Like south, this is meant for images with X:Y ratios larger in the Y dimension (taller) than the screen.
Second, the original image is scaled like centerfit to the largest size that will fit entirely within the screen dimensions and centered on top of the transformation.
blursouth() {
  #
  # Perform two transformations, identical to blur(), except that the
  # background image is aligned like south().
  #
  convert "${file}[0]" -resize "${geom}^" -gravity South \
  -crop "${geom}+0+0" +repage -blur 0x5 "${wallpaper}"
  convert "${file}[0]" -resize "${geom}" -gravity Center \
  -page "${geom}" -background ${color} miff:- | \
  convert -define png:size=${geom} miff:- "${wallpaper}" +swap \
  -gravity Center -background ${color} -composite "${wallpaper}"
  stripexif
}
Starting images:


Results in 16:9 ratio, black background:


Actually Make the Wallpaper Image
Now that all the preparation is done and the functions are defined, I determine the style and call the matching function. I used a case statement instead of using "eval" because, first, eval is a dangerous practice for user input, and second, I want the script to print something useful if the style doesn't match a function.
# Actually make a wallpaper image
#
case "${style}" in
  "tile")         tile        ;;
  "fill")         fill        ;;
  "north")        north       ;;
  "east")         east        ;;
  "west")         west        ;;
  "south")        south       ;;
  "filltile")     filltile    ;;
  "filltilerev")  filltilerev ;;
  "center")       center      ;;
  "centerfit")    centerfit   ;;
  "blur")         blur        ;;
  "blurnorth")    blurnorth   ;;
  "blureast")     blureast    ;;
  "blurwest")     blurwest    ;;
  "blursouth")    blursouth   ;;
  *)
    echo "The style \"${style}\" is not a recognized style."
    echo "Usage: `basename $0` <source-file> <style> [<color>]"
    exit 1
    ;;
  esac
Next: Put the Wallpaper in the Root Window
Because I want the set-wallpaper.sh script to be runnable from cron, I can't have it actually update the root window with the new wallpaper image because I might not be logged in when it runs. Instead, I'll need a separate script. That's in the next article, Set Multiple Overlaid Images As Your Wallpaper: Part 1.